

Connecting craft to culture
October 24, 2017
Day of the Dead is right around the corner and is celebrated in central and southern Mexico as well as across the states. Many families will gather together to celebrate on Oct. 31 – Nov. 2 by creating beautiful alters for their loved ones who have died.
Sugar art was brought to the New World by Italian missionaries in the 17th century. The first religious mention of sugar art was from Palermo at Easter time when little sugar lambs and angels were made to adorn the side altars in the Catholic Church.
The creation of sugar skulls began when sugar art was brought to the New World by Italian missionaries in the 17th century. The first mention was from Palermo Church at Easter time when little sugar lambs and angels were made to adorn the side altars in the Catholic Church.
Because sugar was abundant in production and Mexico couldn’t afford imported European chocolate, sugar art became a huge part of their religious festivals and they go back to the Colonial Period 18th century. Clay was sculpted into figures of angels, sheep and then used as molds to form the sugary creations. Sugar skulls began to represent a departed soul, and contained their name written on the forehead.
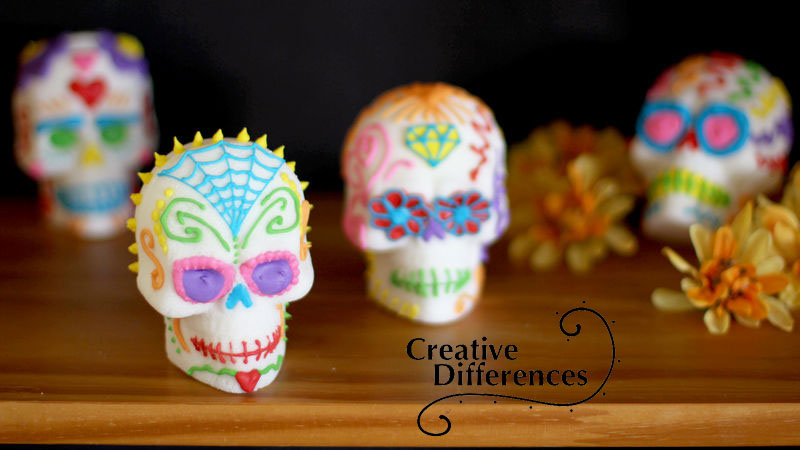
Sugar skulls are commonly placed on the home ofrenda (alter) or gravestone to honor the return of a particular spirit. Sugar skull art reflects the folk art style of big happy smiles, colorful icing and sparkly tin and glittery adornments. They contain traditional Mexican color schemes and symbols of prosperity.
Although they seem common in the month of October across Mexico, they are labor intensive and made in very small batches in the homes of sugar skull makers. These wonderful artisans are disappearing as ready to use DIY kits and imported candy skulls take their place.
You can make your own sugar skull by using this recipe
Ingredients include:
- 1/4 cup meringue powder
- 6 cups granulated sugar
- 1/3 cup water
- 7 1/2 teaspoon meringue powder
- 6 teaspoons water
- Royal icing with fine tips in as many colors as you want
- Skull mold
You can also follow these steps with images in the slide show above this article.
Step 1: Mix the granulated sugar, meringue powder and water together until all the granules of sugar are wet. Pick up a handful of the mixture and squeeze in your hand. If it holds together, its ready. If it falls apart, it will need a tiny bit more water.
Step 2: Fill your skull mold with the wet sugar, pressing down on the sugar, compacting it as you go. Fill both the front and back skull cavities with the sugar. Scrape off the excess sugar.
Step 3: Cut a piece of parchment paper and a piece of cardboard just a bit bigger than your mold. Set the parchment paper down on top of the mold. Set the cardboard on top of the paper. Grab onto the mold and cardboard and carefully flip the whole thing upside down. Set it on the counter, then carefully lift the mold up off the sugar skulls. The mold should pop right off. If the sugar sticks, it’s too wet. Scrape it out of the mold, clean the mold, and add some more dry sugar to the mixture and try molding it again. If your sugar skulls do not hold together, the mixtures needs more water.
Step 4: Your sugar skulls now need to dry. Midway through the drying cycle you need to carefully flip them over so the back sides can dry out at well. They should be ready to decorate in 12-24 hours.
Step 5: Once your skulls are dried, spread a thin layer of royal icing on the flat part of the back side of each skull. Press the front and back sides together. Use your finger to wipe off the icing that oozes out from in between the two pieces. Allow the skulls to dry for at least an hour.
Step 6: Pipe royal icing onto the skulls. Any simple or elaborate designs. Get as creative as you’d like and use lots of bright colors on each skull for a dramatic appearance. Let the icing dry for at least 24 hours.